


Eighteeth Nanopix Dental RVG
- 0
Over weight charges
Description
Eighteeth Nanopix Dental RVG is a state-of-the-art intraoral X-ray sensor that boasts a unique and ergonomic design, making it comfortable for dentists and patients alike. Its cupped cable connection ensures that fingers are positioned comfortably during the imaging process, while the robust cable connection guarantees the device’s durability. NanoPix is also incredibly thin, measuring just 4.4mm, which makes it the thinnest X-ray sensor on the market today. It utilizes AED technology, which is compatible with almost all DC and AC X-ray generators, allowing digital images to be acquired automatically when the X-ray is switched on.Eighteeth Nanopix Dental RVG also utilizes APS CMOS technology, which was originally developed for the aerospace industry. This technology offers a high signal-to-noise ratio with maximum details, has a long lifespan, and consumes low power. the Nanopix Dental RVG offers significant cost savings, with a 1/10 cost per patient compared to film-based X-ray systems. The imaging process with this device is also incredibly fast, with the entire process taking just 3 seconds to complete. the Nanopix Dental RVG comes equipped with smart software that is easy to install and offers a user-friendly interface. It also enables faster image acquisition and provides better-quality images.
- The thinnest X-ray sensor ever- 4.4mmx
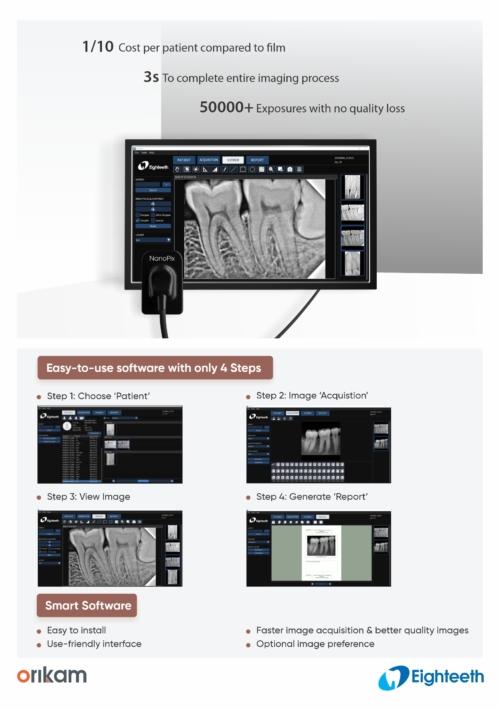
- 1/10th cost per patient compared to film
- 3s to complete image processing
- 50,000+ exposures with no quality loss
- 70,000+ bending tests passed
- Automatic Exposure Detection
- APS CMOS technology for high signal-to-noise ratio
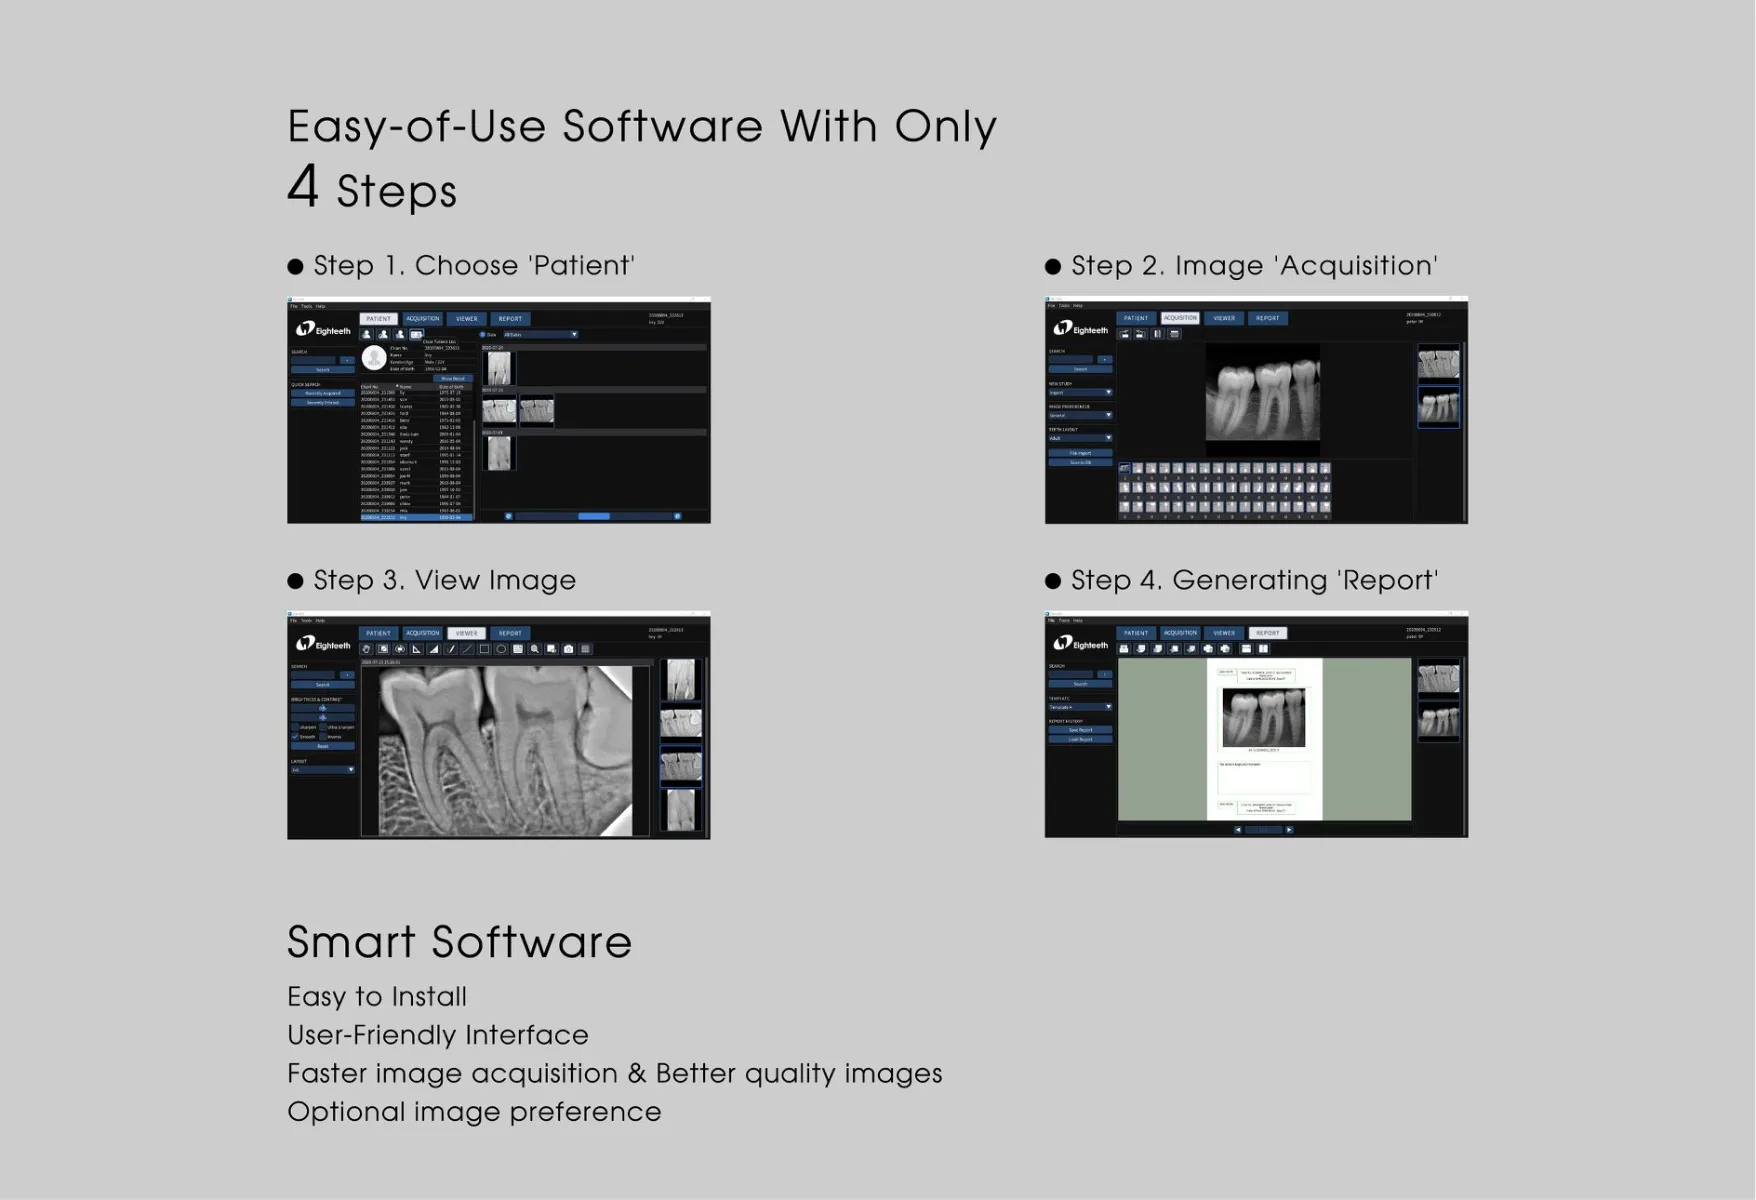
- User friendly 4 step software
- True resolution of 20 lp/mm
- AD conversion- 16 bit
Net Contents:
- Main Unit
- USB Flash Driver
- Sensor Mounting Bracket
- Silicone Protective Cover
- Disposable Sleeve.
Features:
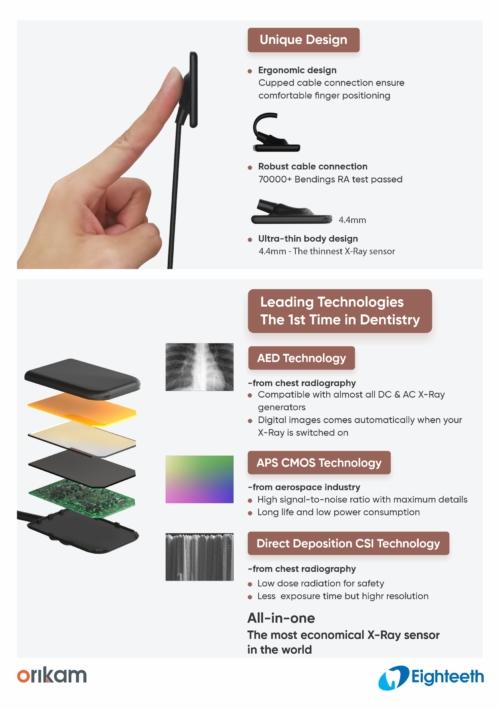
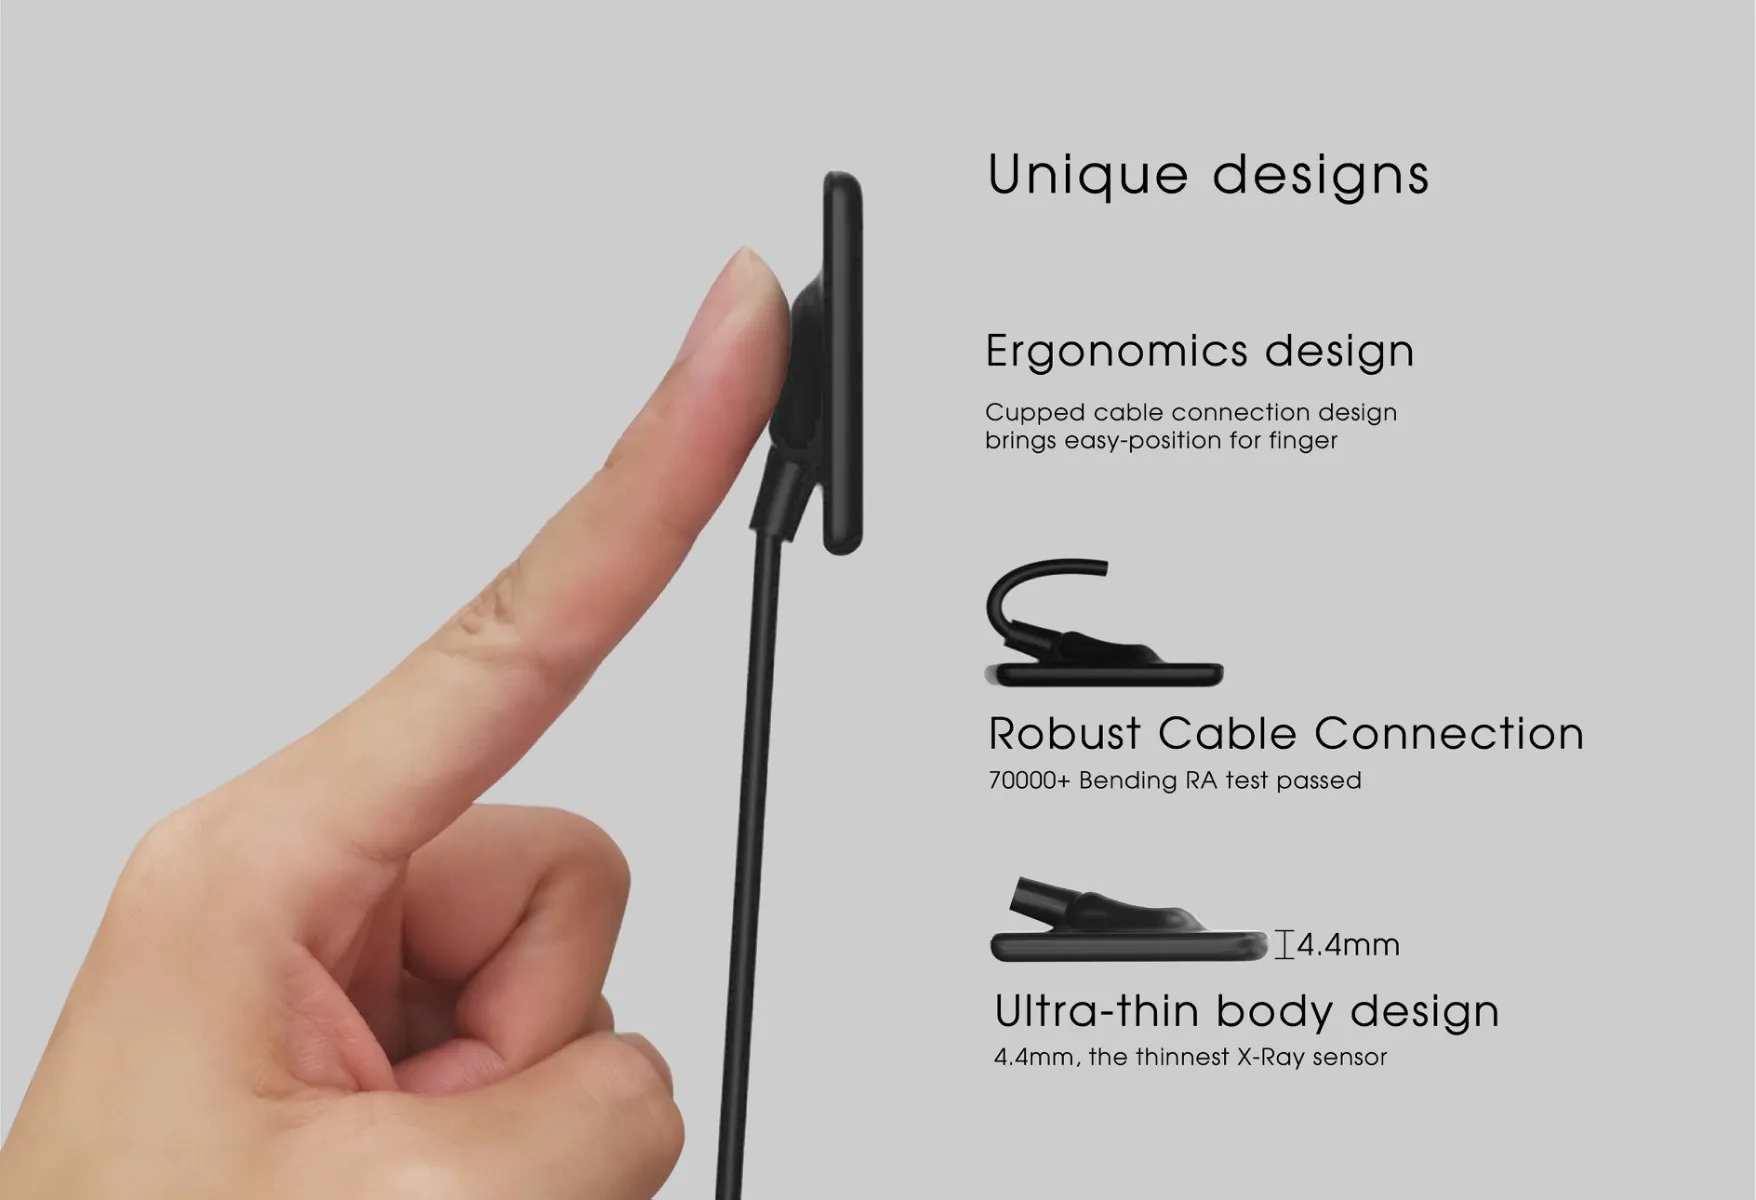
Unique Design
- Ergonomic design: Cupped cable connection ensures comfortable finger positioning
- Robust cable connection
- Ultra-thin body design: 4.4mm – The thinnest X-Ray sensor
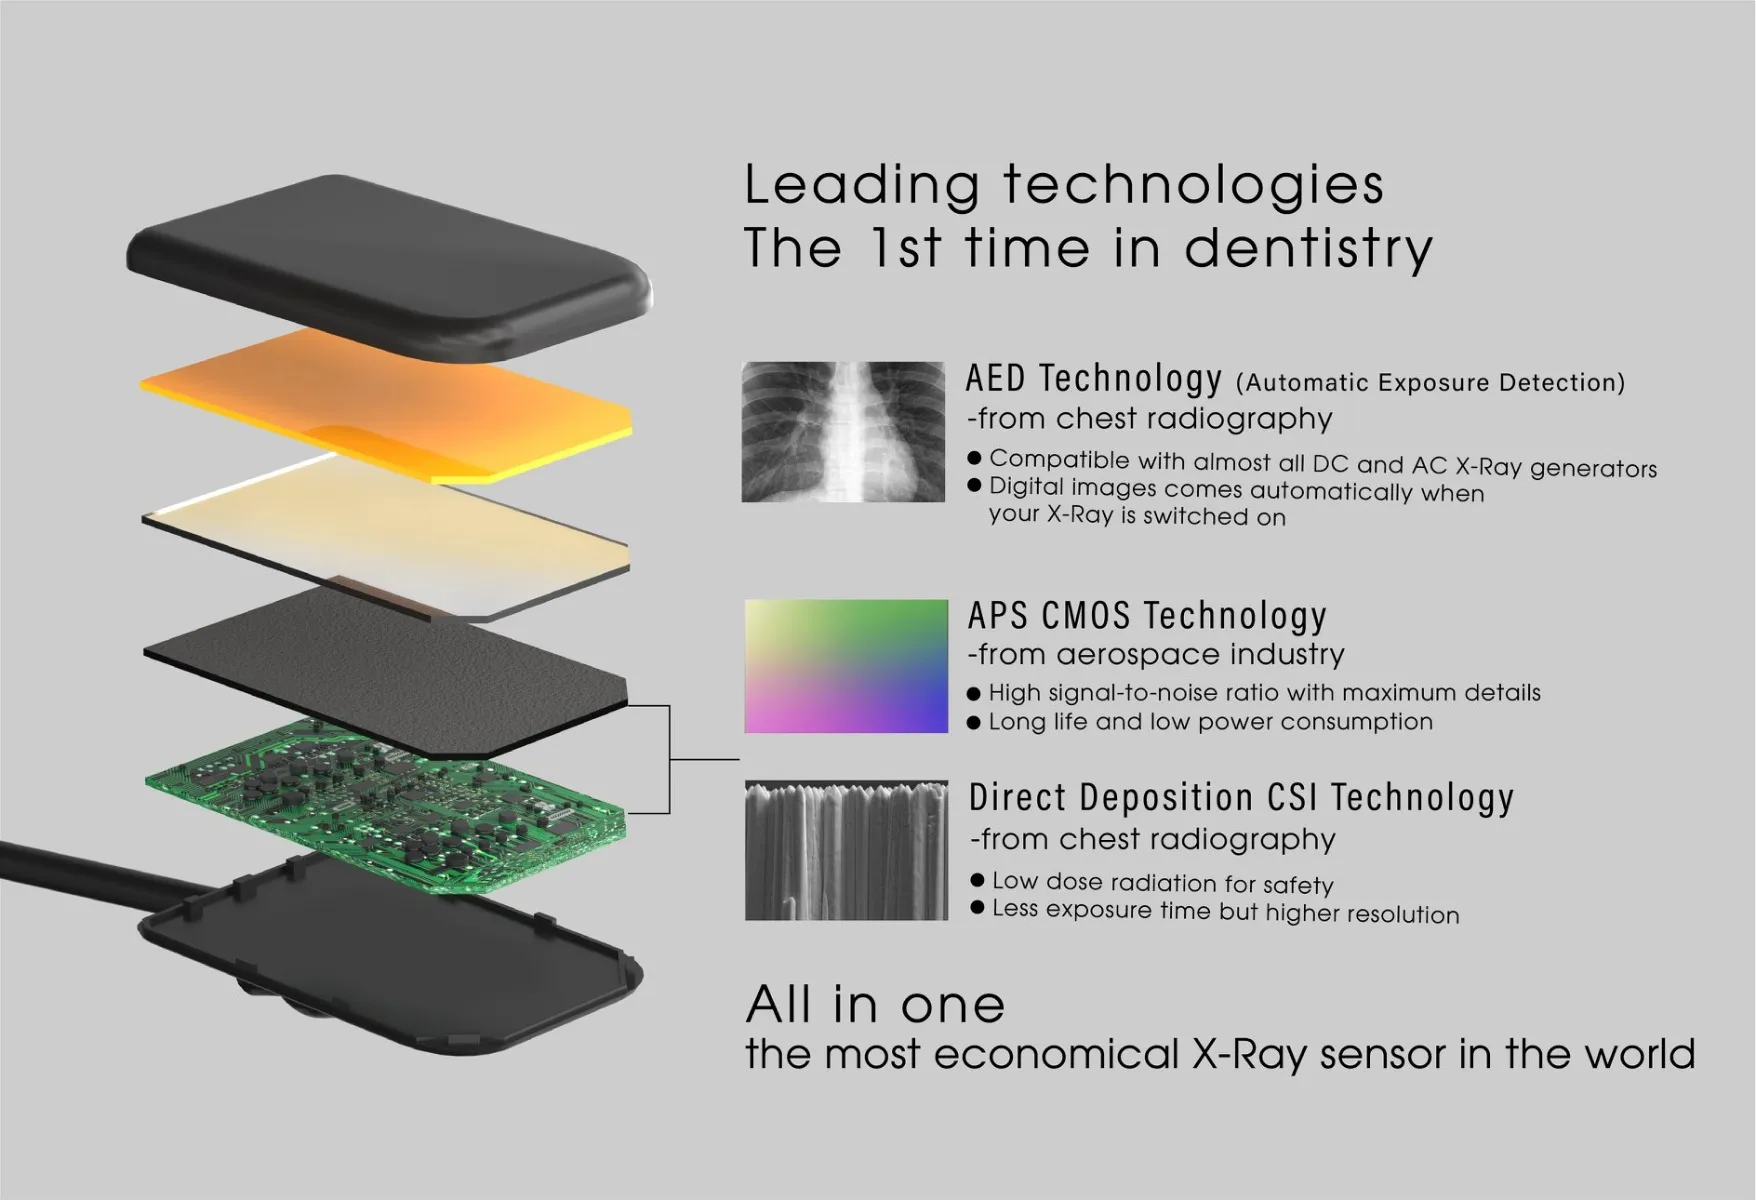
AED Technology
- From chest radiography
- Compatible with almost all DC & AC X-Ray generators
- Digital images come automatically when your X-Ray is switched on
APS CMOS Technology
- From aerospace industry
- High signal-to-noise ratio with maximum details
- Long life and low power consumption
Direct Deposition CSI Technology
- From chest radiography
- Low dose radiation for safety
- Less exposure time but higher resolution
Smart Software
- Easy to install
- User-friendly interface
- Faster image acquisition & better-quality images
- Optional image preference.
Key Specification:
| NanoPix1 | NanoPix2 | |
| Detector Technology | APS CMOS | APS CMOS |
| Scintillator | Csl | Csl |
| Pixel Matrix | 1000*1500 | 1300*1800 |
| Theoretical Resolution | 25Ip/mm | 25Ip/mm |
| True Resolution | 20Ip/mm | 20Ip/mm |
| Active Area (mm) | 20*30 | 26*36 |
| Mechanical Size (mm) | 25.4*36.8*4.4 | 30.4*41.9*4.4 |
| AD Conversion (bit) | 16 | 16 |
| Data Interface | USB 2.0 | USB 2.0 |
| Protection | Ip68 | IP68 |
Direction to Use:
How to installation:
- Read the User Manual: Carefully review the user manual provided by the manufacturer. It contains essential information on installation procedures and usage guidelines.
- System Requirements: Ensure that your computer system meets the hardware and software requirements specified by the manufacturer.
- Software Installation: Insert the installation Usb or download the software from the manufacturer’s website. Follow the on-screen instructions to install the imaging software on your computer.
- Driver Installation: If required, install any drivers necessary for the X-ray sensor to communicate with your computer.
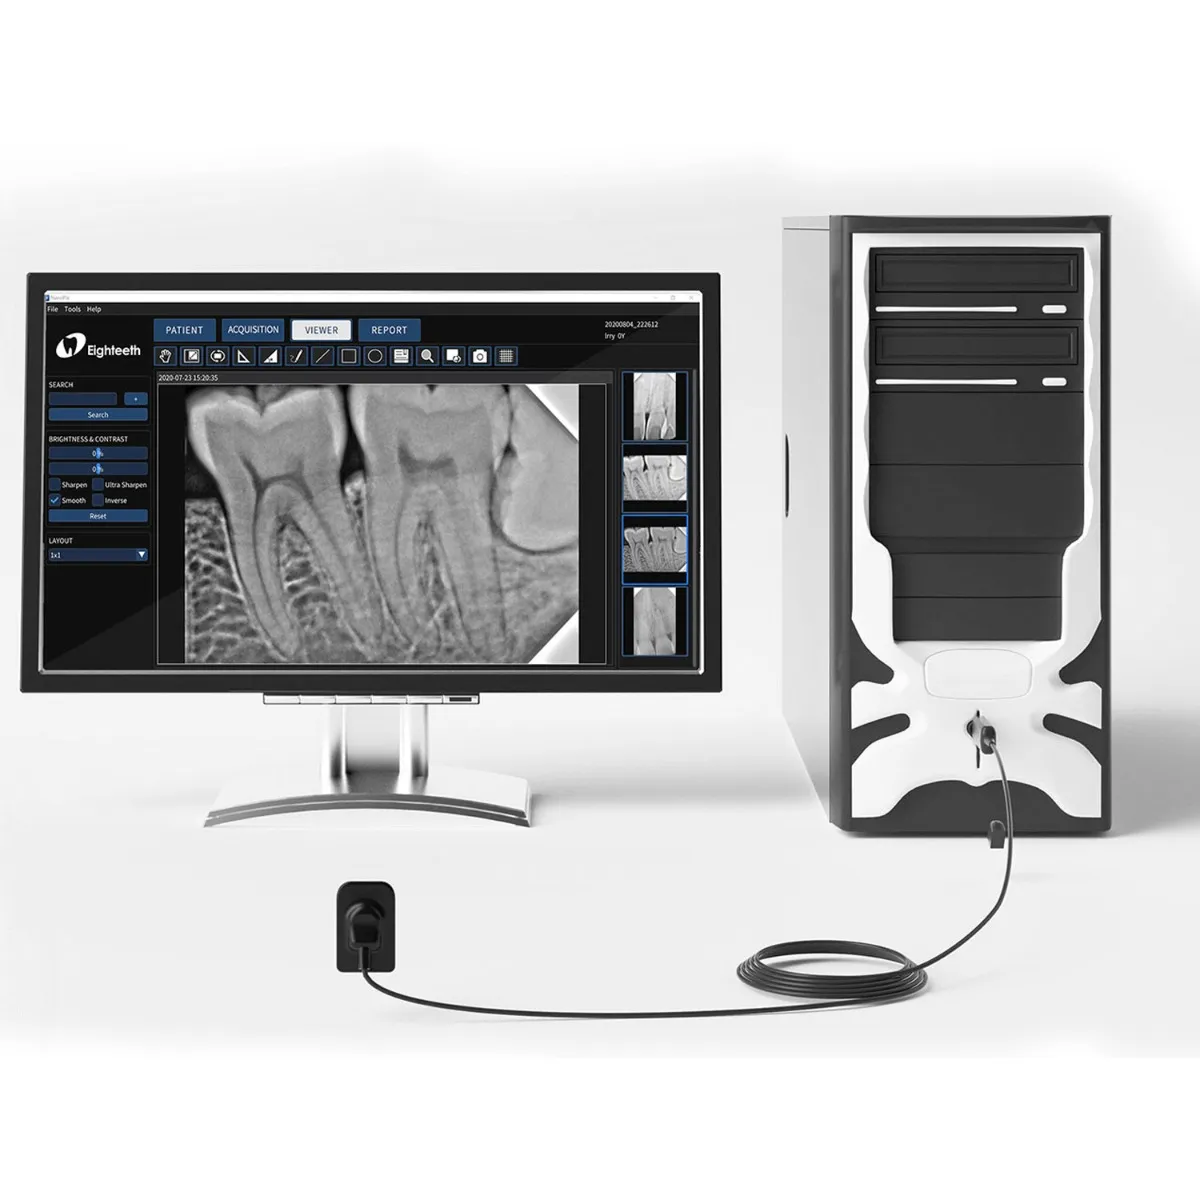
- Connect the X-ray Sensor: Connect the Nanopix Dental RVG to your computer using the provided USB cable.
- Calibration: Perform any calibration procedures specified in the user manual to ensure accurate imaging.
How to use:
- Power On the X-ray Generator: Turn on the X-ray generator to initiate the automatic digital image acquisition process.
- Finger Positioning: Ensure that the cupped cable connection is used for comfortable finger positioning during the imaging process.
- Patient Positioning: Position the X-ray sensor correctly in the patient’s mouth for the desired imaging area.
- Capture Images: Follow the software instructions to capture images. Depending on the software, this may involve clicking a button or using a footswitch.
- Review Images: After capturing images, review them on the software interface. Check for image quality and make any necessary adjustments.
- Save and Manage Images: Save the captured images to the designated folders and manage them within the software interface.
- Optional Preferences: Explore and set any optional image preferences available in the software for customization.
- Shutdown Procedure: Follow the manufacturer’s guidelines for properly shutting down the X-ray sensor and associated software.
Packaging:
- 1 x Intraoral X-Ray Sensor
- 1 x USB Flash Driver
- 1 x Sensor Mounting Bracket
- 1 x USB Extension Cable
- 1 x Silicone Protective Cover
- 100 x Disposable Sleeve
Related products
-
Sale!
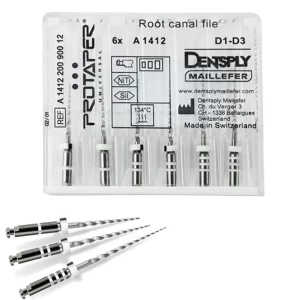
Dentsply Protaper Universal Retreatment Rotary Files
₹3,400 Select options This product has multiple variants. The options may be chosen on the product page -
Sale!
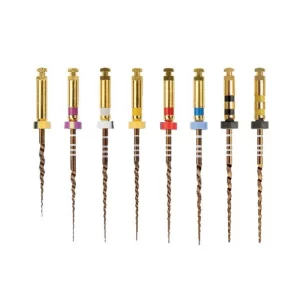
Dentsply Protaper Gold Rotary Files 21mm
₹2,870 – ₹2,881 Select options This product has multiple variants. The options may be chosen on the product page -
Prudent Professional Deluxe Dental Chair
₹161,280 Add to cart -
Sale!
APPLE Airotor Standard Handpiece Push Button
₹3,200Original price was: ₹3,200.₹2,300Current price is: ₹2,300. Add to cart